Connect Auth0 to Azure Active Directory with SAML
During a recent prototyping project I needed to connect our Auth0 tenant to a third parties Azure Active Directory (AD) tenant. The process was a little more confusing than I thought it should be, I hope to make the process more straight forward in this article. This article should serve as a resource for anyone configuring a connection between Azure AD and Auth0, some steps might be ignored based on your use case.
In my example integration I had access to both an Azure AD tenant and my own Auth0 tenant. While I had access to both I need to pretend that I would only have access to Auth0 and some publicly available information from the administrator of the Azure AD. I didn’t want to have to worry about exchanging sensitive information like secrets, passwords, or private keys in order to make the connect work. My goal was to provide only a clear set of instructions and no information I would loose sleep over.
Based on the constraints I listed above and the user experience (UX) we were wanting to provide I elected to use the SAML protocol for connecting the two parties. Security Assertion Markup Language (SAML) is a well recognized standard for exchanging information, like authentication and authorization information, between parties. SAML is often seen in Single Sign-On (SSO) environments where an enterprise wants to manage all user access from a central location. Once a user is authenticated they can then freely move between applications without having to enter different credentials to do so.
Identity Provider vs. Service Provider
With this type of connection there are two parties involved, the Identity Provider and the Service Provider. In our scenario Azure AD is the Identity Provider, representing users from another organization, and Auth0 is the Service Provider, providing access to the application or service. This diagram shows how the Identity Provider and Service provider relate to the user, along with the flow of information between the parties.
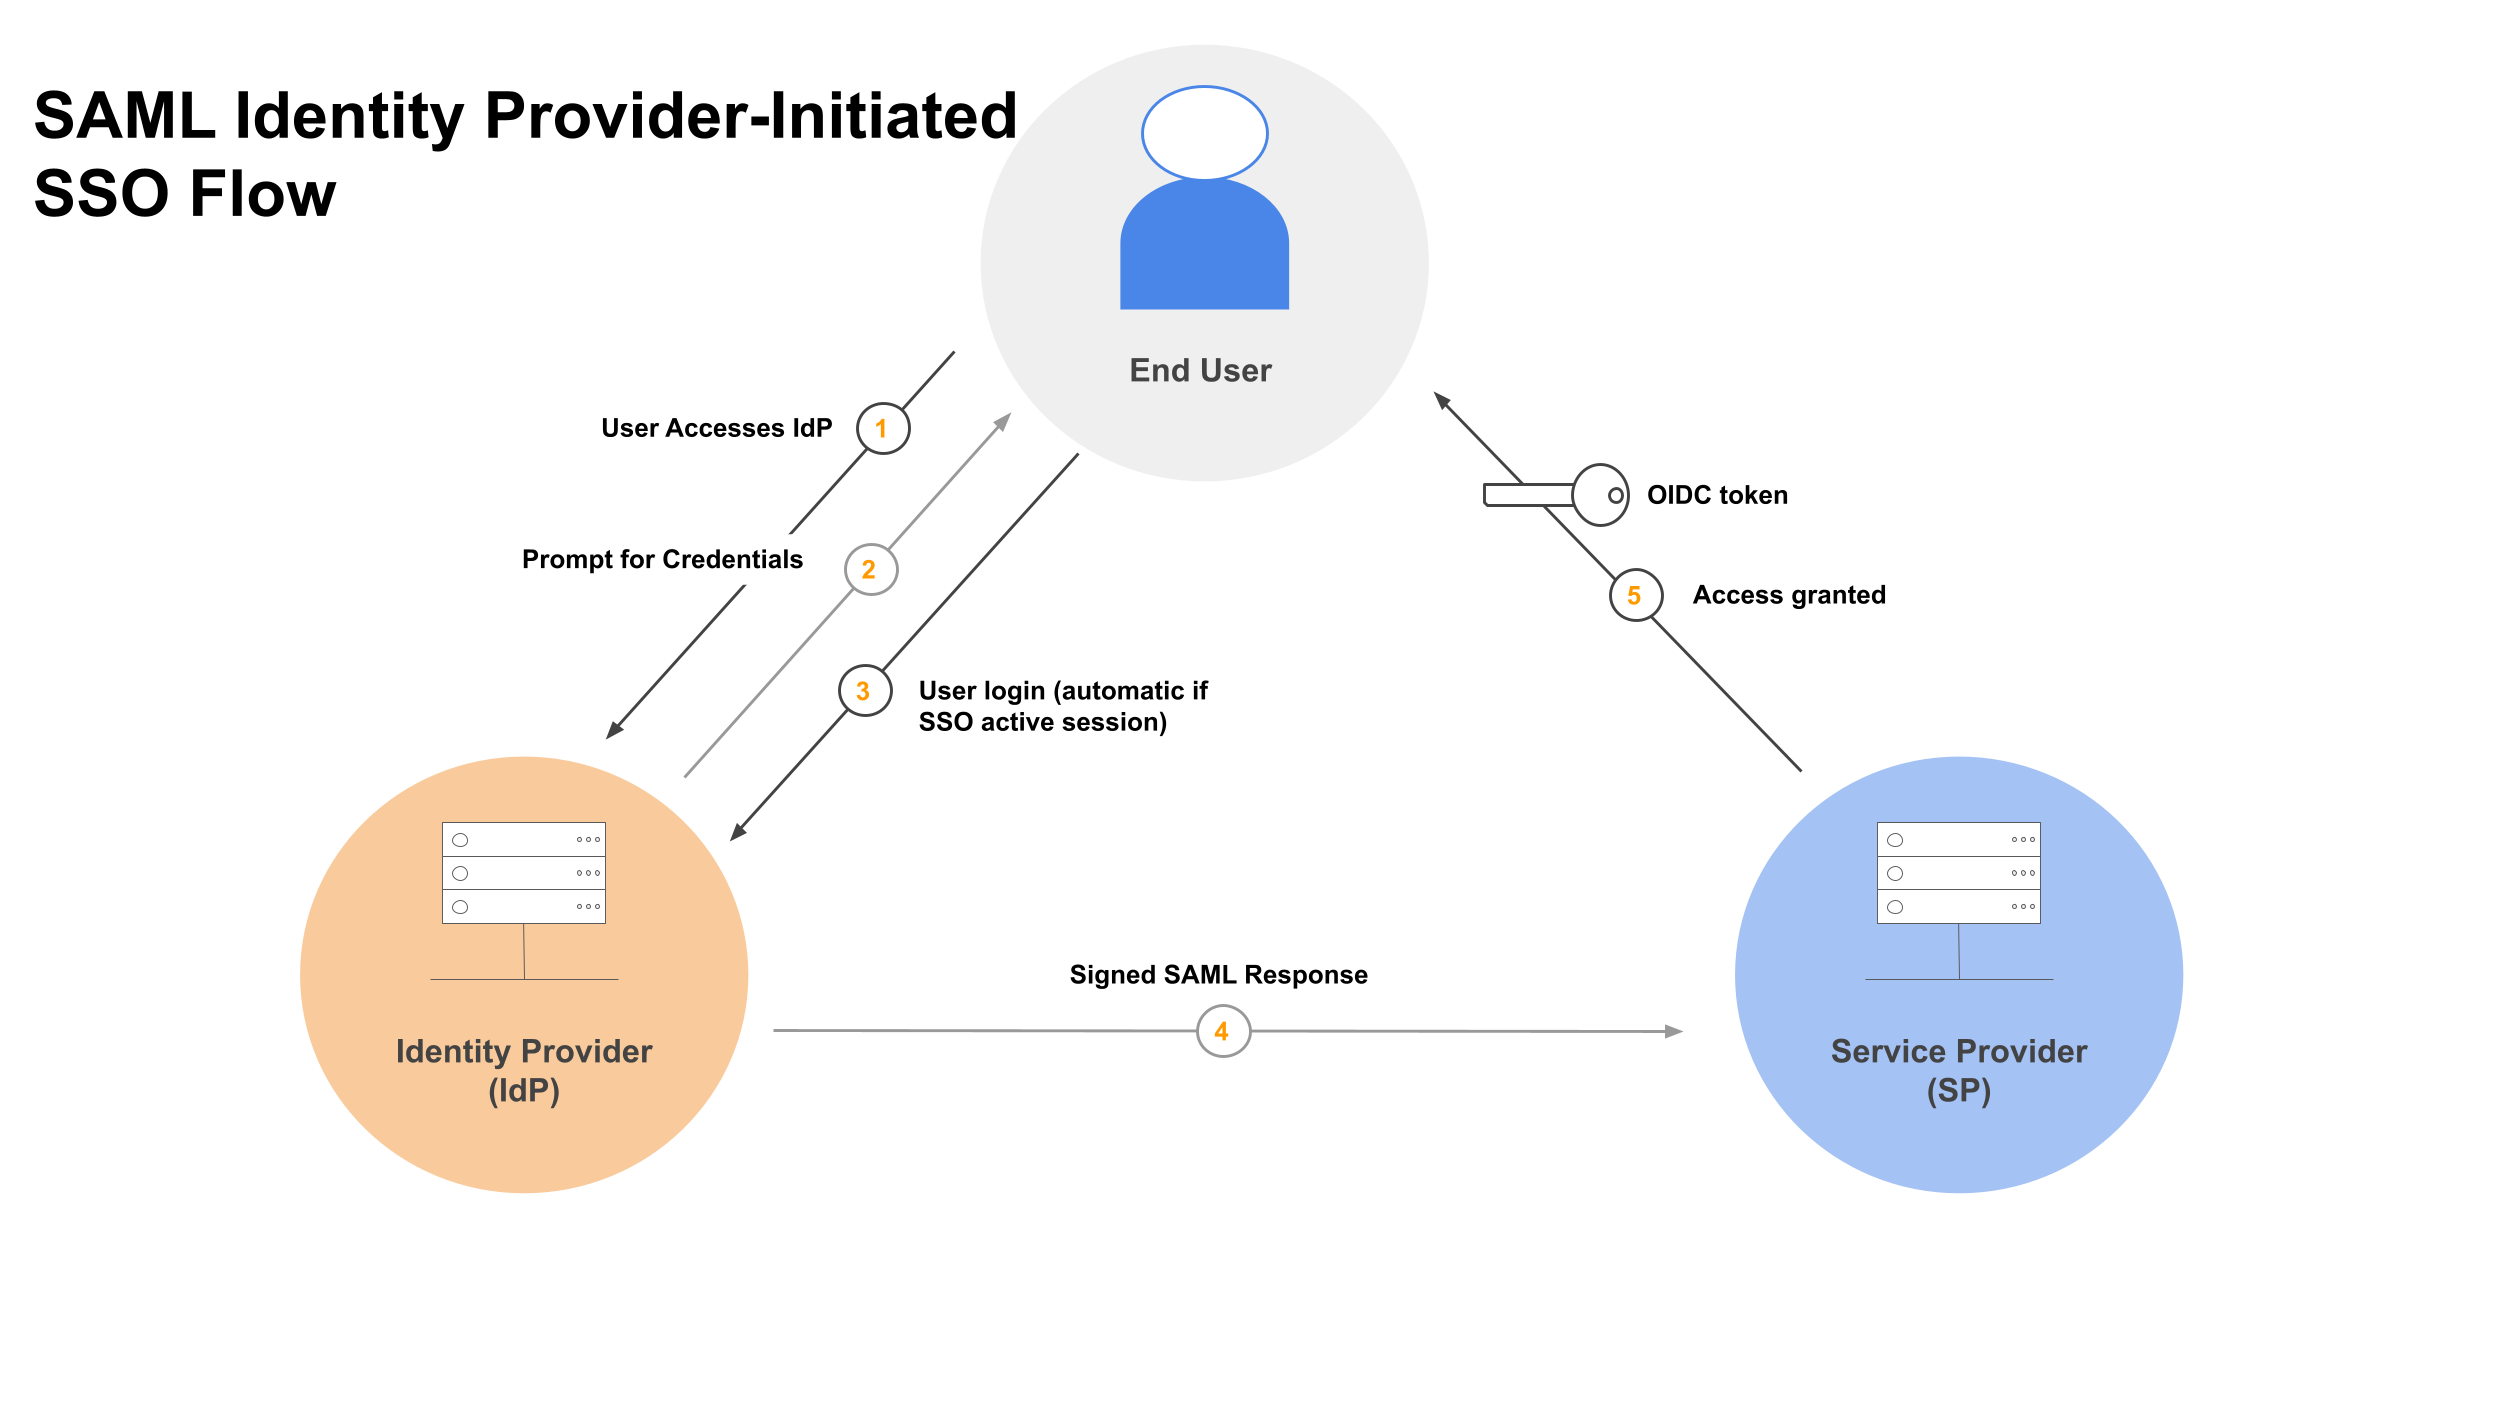
Identity Provider: Azure AD, third party
Service Provider: Auth0, full access
We’ll start by configuring Azure AD, we can do most of the configuration upfront which will be necessary to configure Auth0 in a following step. The remainder of this article will be more of a step-by-step walkthrough with highlighted screenshots.
Configuring Azure AD
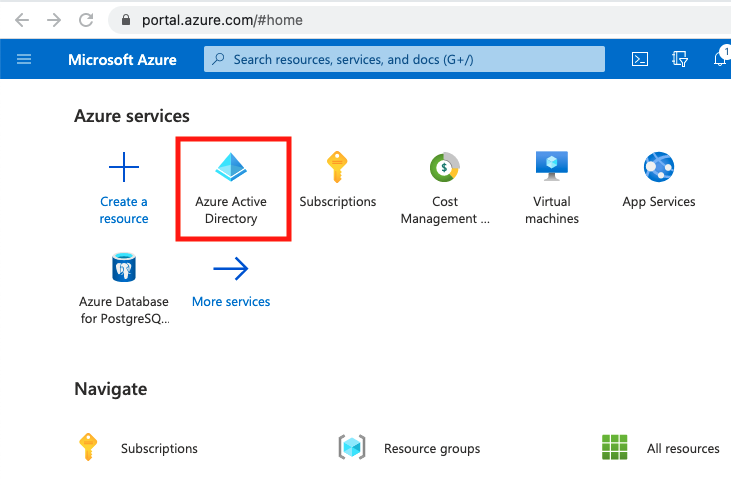
From the Azure Portal Home screen, select Azure Active Directory.
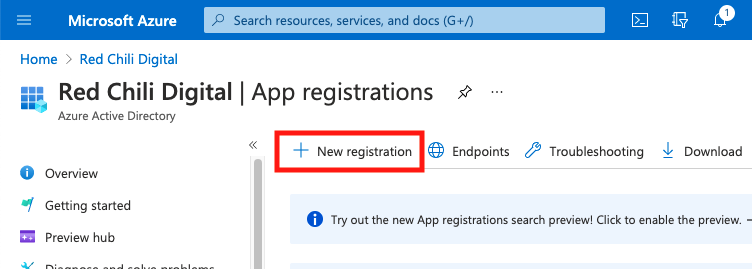
From the Azure AD Overview screen, select App registrations, we’ll need to create a new application.

From the App registrations screen, select New registration.
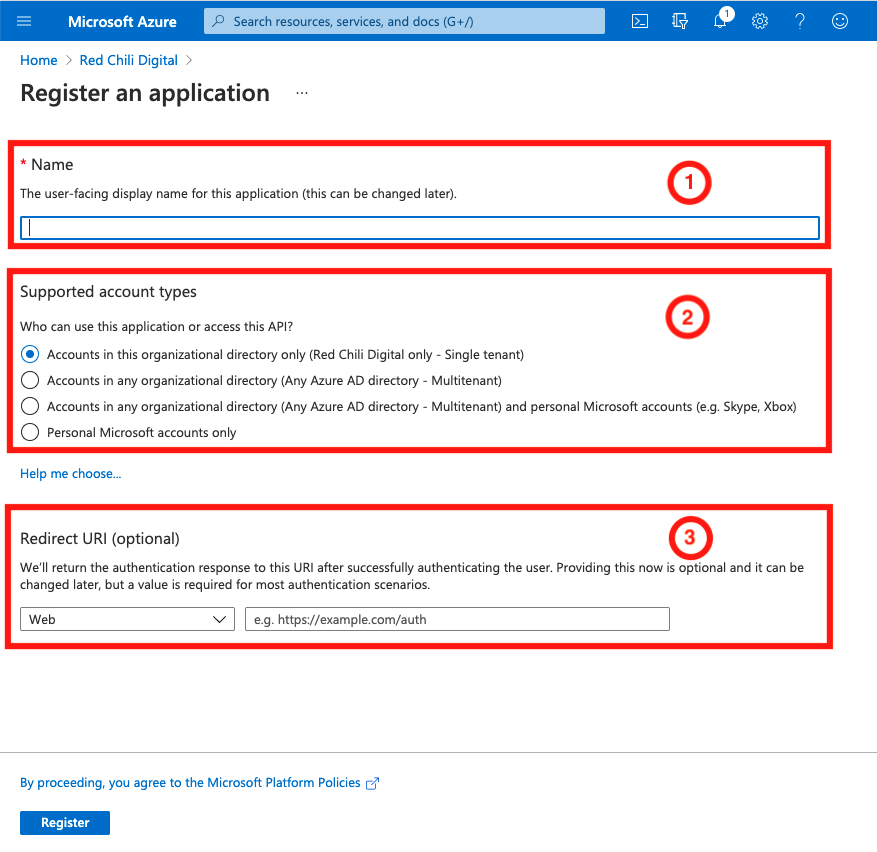
Complete the Register an application form, with the following:
- Name: choose a name that is unique to the organization and describes the function of the application
- Supported account types: Select the account type(s) that you want to support with this application configuration. This allows for sharing information across Azure AD tenants if available.
- Redirect URI: This is where Azure AD will redirect the user upon successful authentication, in our scenario we’ll need information from Auth0 first
Select Register
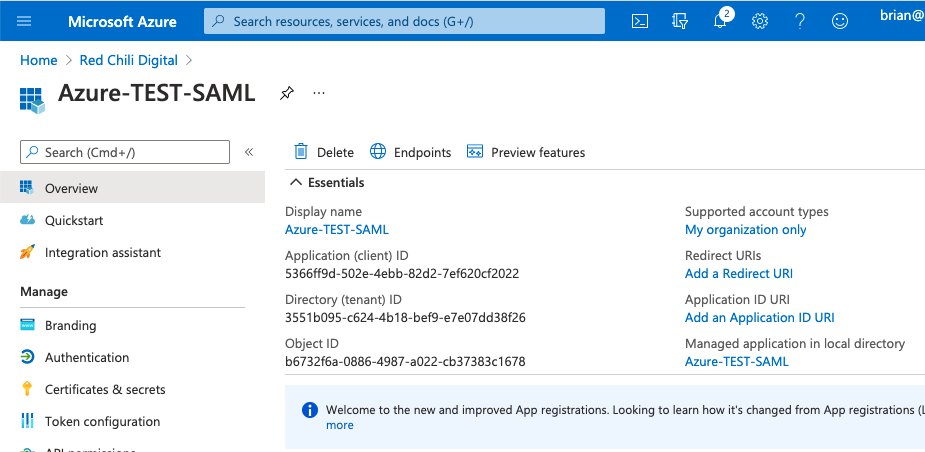
After being redirected to our new Azure AD App, we can now grab a little bit of information before continuing our configuration on the Auth0 side.
Select the Endpoints link in the upper menu of the new application.
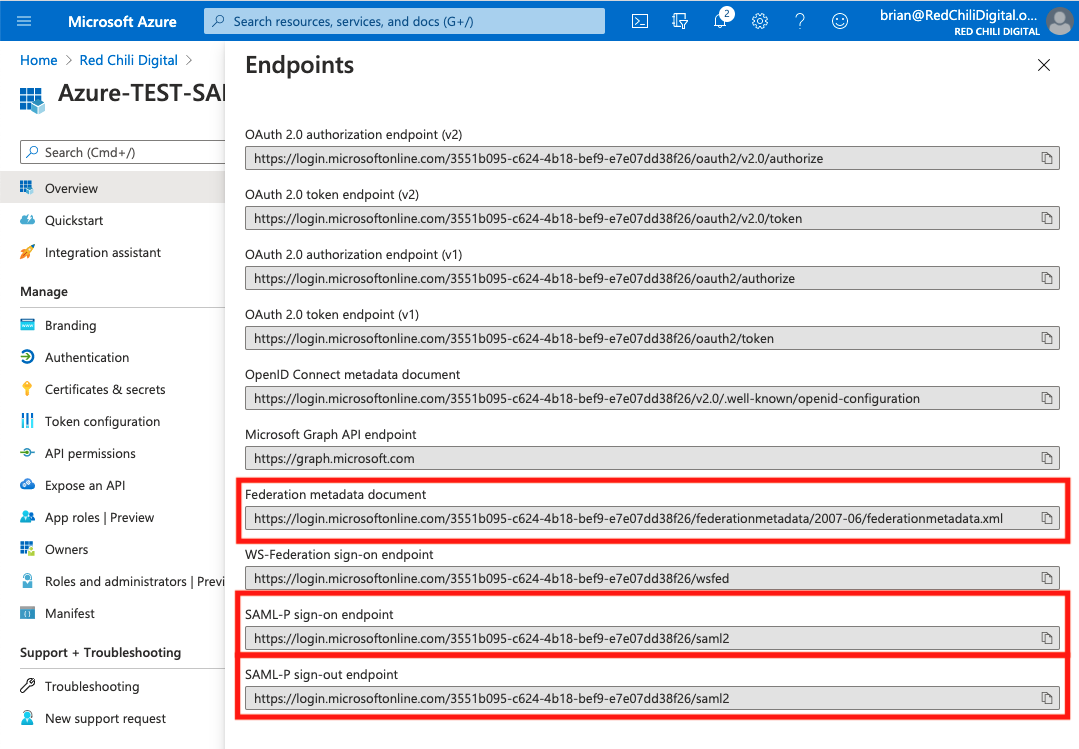
Copy the following links, we’ll need them to complete the configuration in Auth0.
- Federation metadata document: This is an XML document that has information about the Azure AD tenant, including the X509 certificate that will be used for verifying information shared between parties.
- SAML-P sign-on endpoint: The endpoint that will be used to sign-on users
- SAML-P sign-out endpoint: The endpoint that will be used to sign-out users
Configuring Auth0
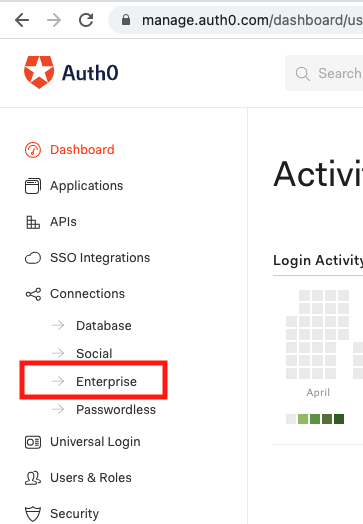
From the Auth0 Console Dashboard, we’ll start by creating a new Connection.
Select Connections > Enterprise
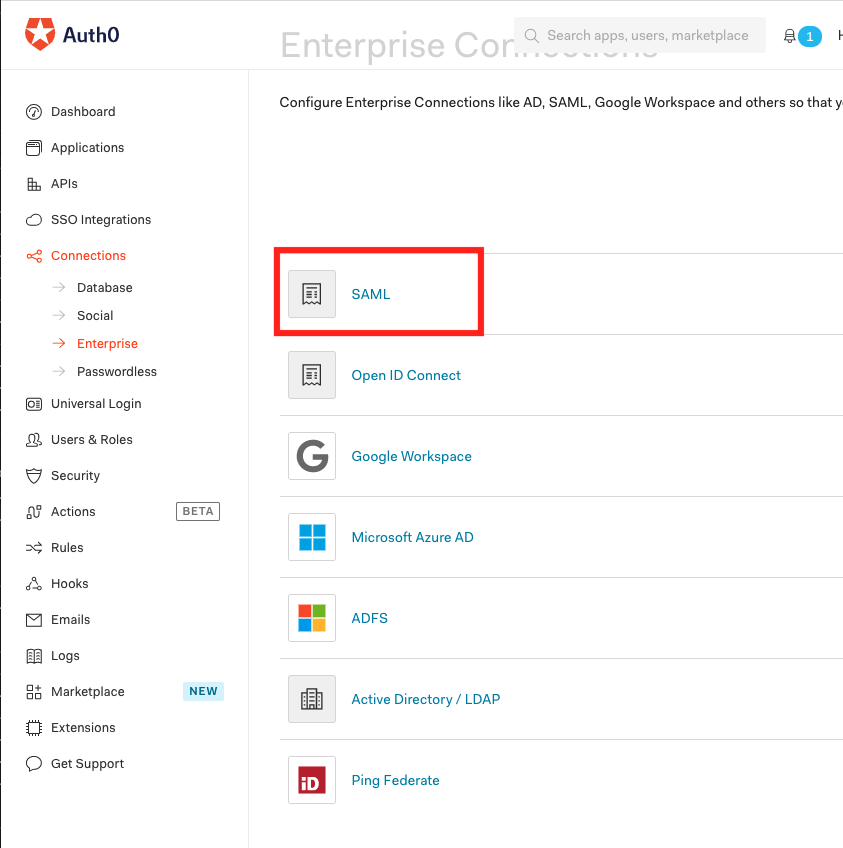
On the Enterprise Connections screen we see several options for integrating with various Active Directory services, it you have a configuration that allows you to have full access to both Auth0 and a specific Active Directory you might choose one of these options. Because we are pretending we don’t have full access to the Active Directory server we’re integrating with, we won’t do that.
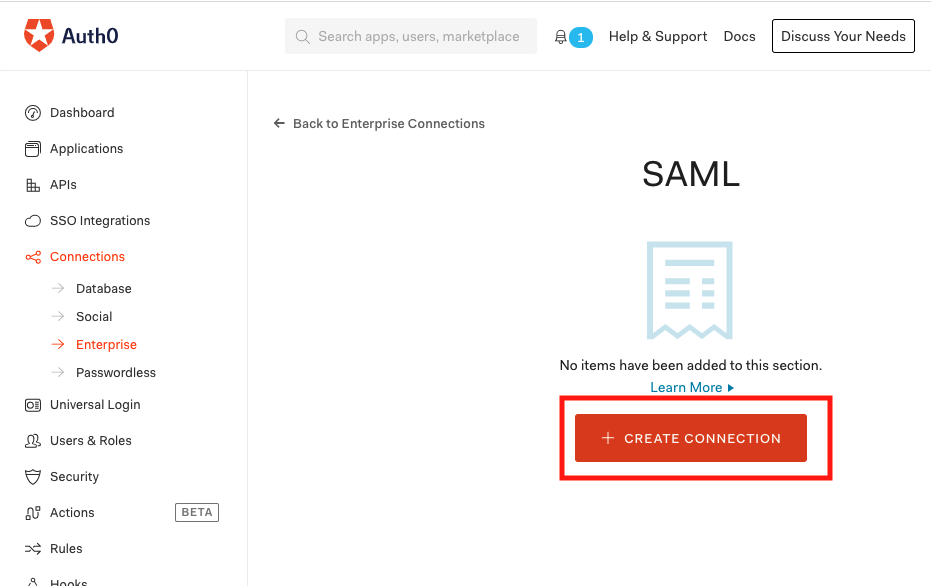
Select the SAML link.
From the SAML Enterprise Connections screen, select CREATE CONNECTION
Complete the form with the following information:
- Connection Name: choose a name that is unique to the organization and describes the function of the application, this name will be available to anyone connecting with this application, i.e. Azure AD
- Sign In URL: This is the SAML-P sign-on endpoint that was copied from the Azure AD endpoints
- X509 Signing Certificate: This is the certificate provided by the identity provider, Azure AD. The signing certificate is made available in the Federation metadata document which was one of the endpoints copied from Azure AD. Follow this article to generate a valid X509 certificate: Convert X509 Certificate From Metadata
- Sign Out URL: This is the SAML-P sign-out endpoint that was copied from the Azure AD endpoints. While this is optional, because we have the endpoint url I recommend enabling and adding the url
- User ID Attribute: This value maps the value we receive for a unique ID from Azure AD to our Auth0 user. We can update this field after we successfully test our connection and know the shape of the data being returned.
- Debug Mode: Accept default disabled
- Sign Request: Accept default enabled. Select the certificate link to download a .pem certificate from Auth0. We’ll provide this to our Azure AD administrator.
- Sign Request Algorithm: Select RSA-SHA256
- Sign Request Algorithm Digest: Select SHA256
- Protocol Binding: Select HTTP-POST
- Sync user profile attributes at each login: Accept default enabled
Once the form is complete, select create.
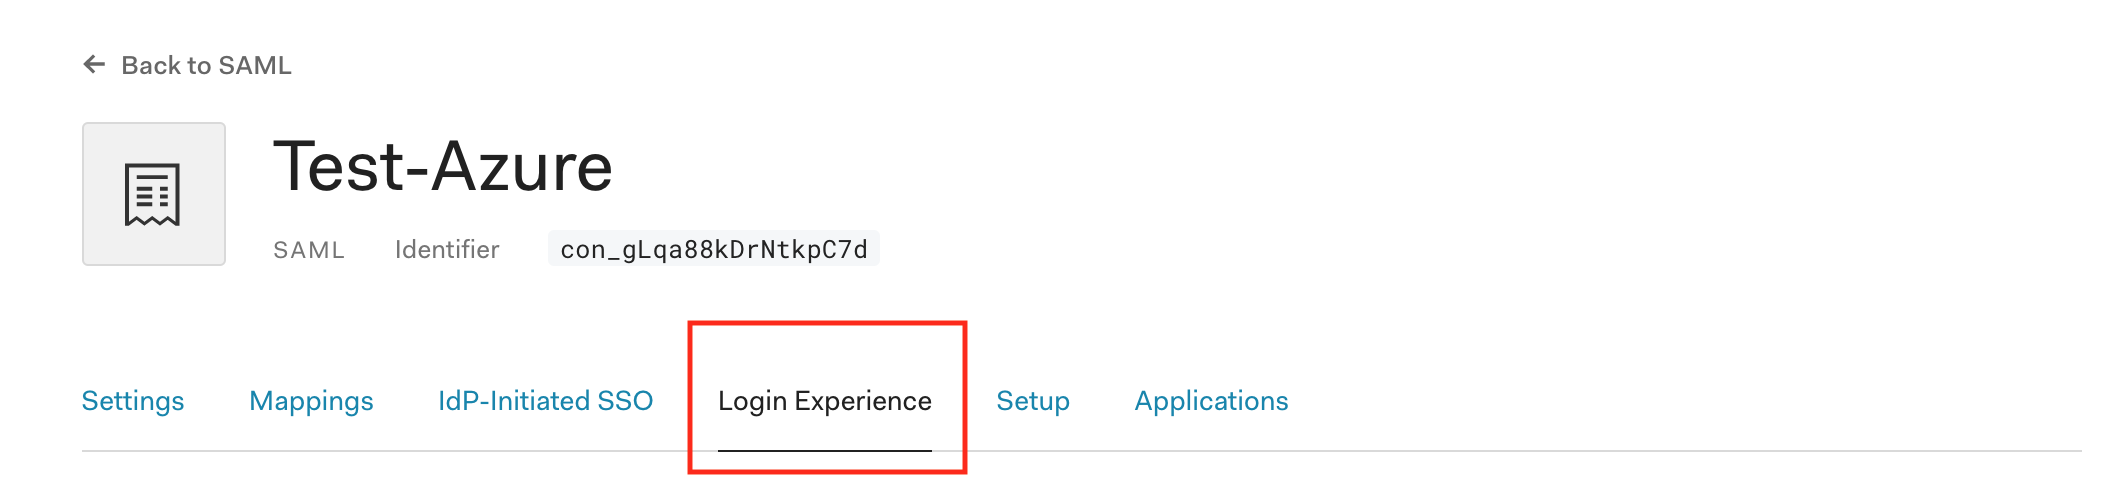
From our new Auth0 SAML connection, we need to configure just a few more things. First we need to add the Identity Provider domains for our Azure AD.
Select the Login Experience tab
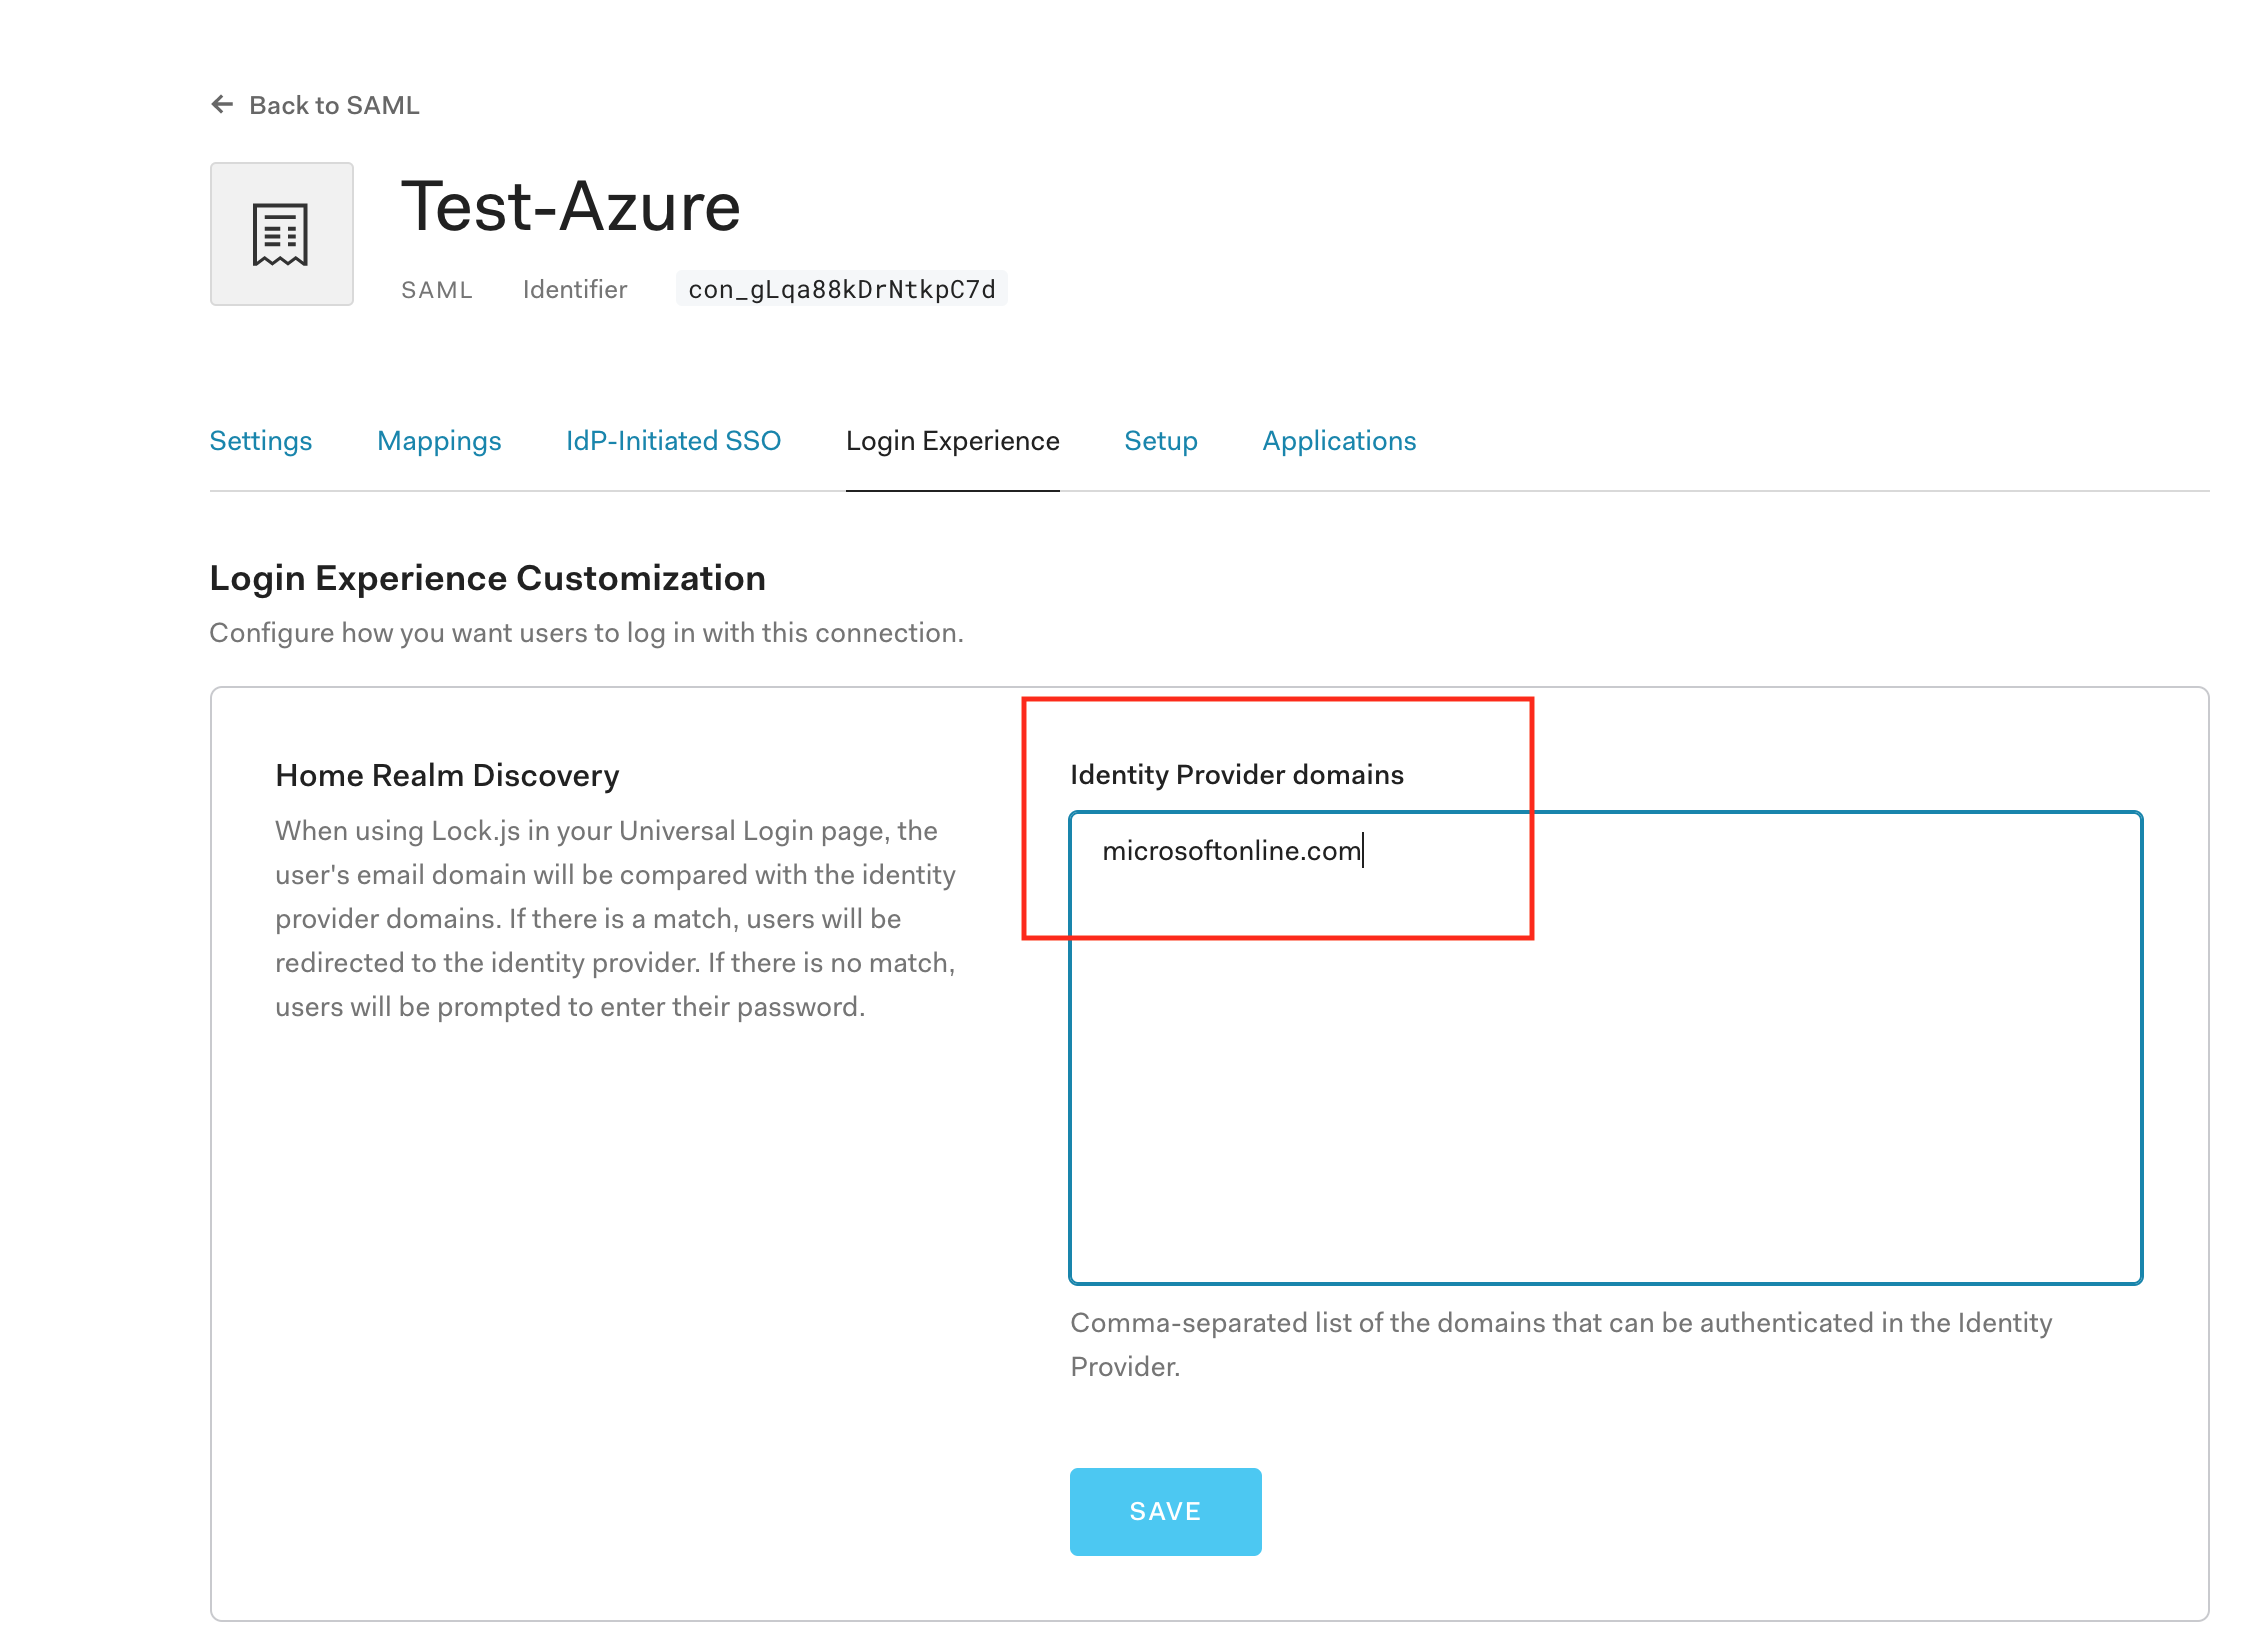
Enter all relevant Identity Provider domains, separated by commas. For example, my Azure AD user has a microsoftonline.com email address.
Select Save
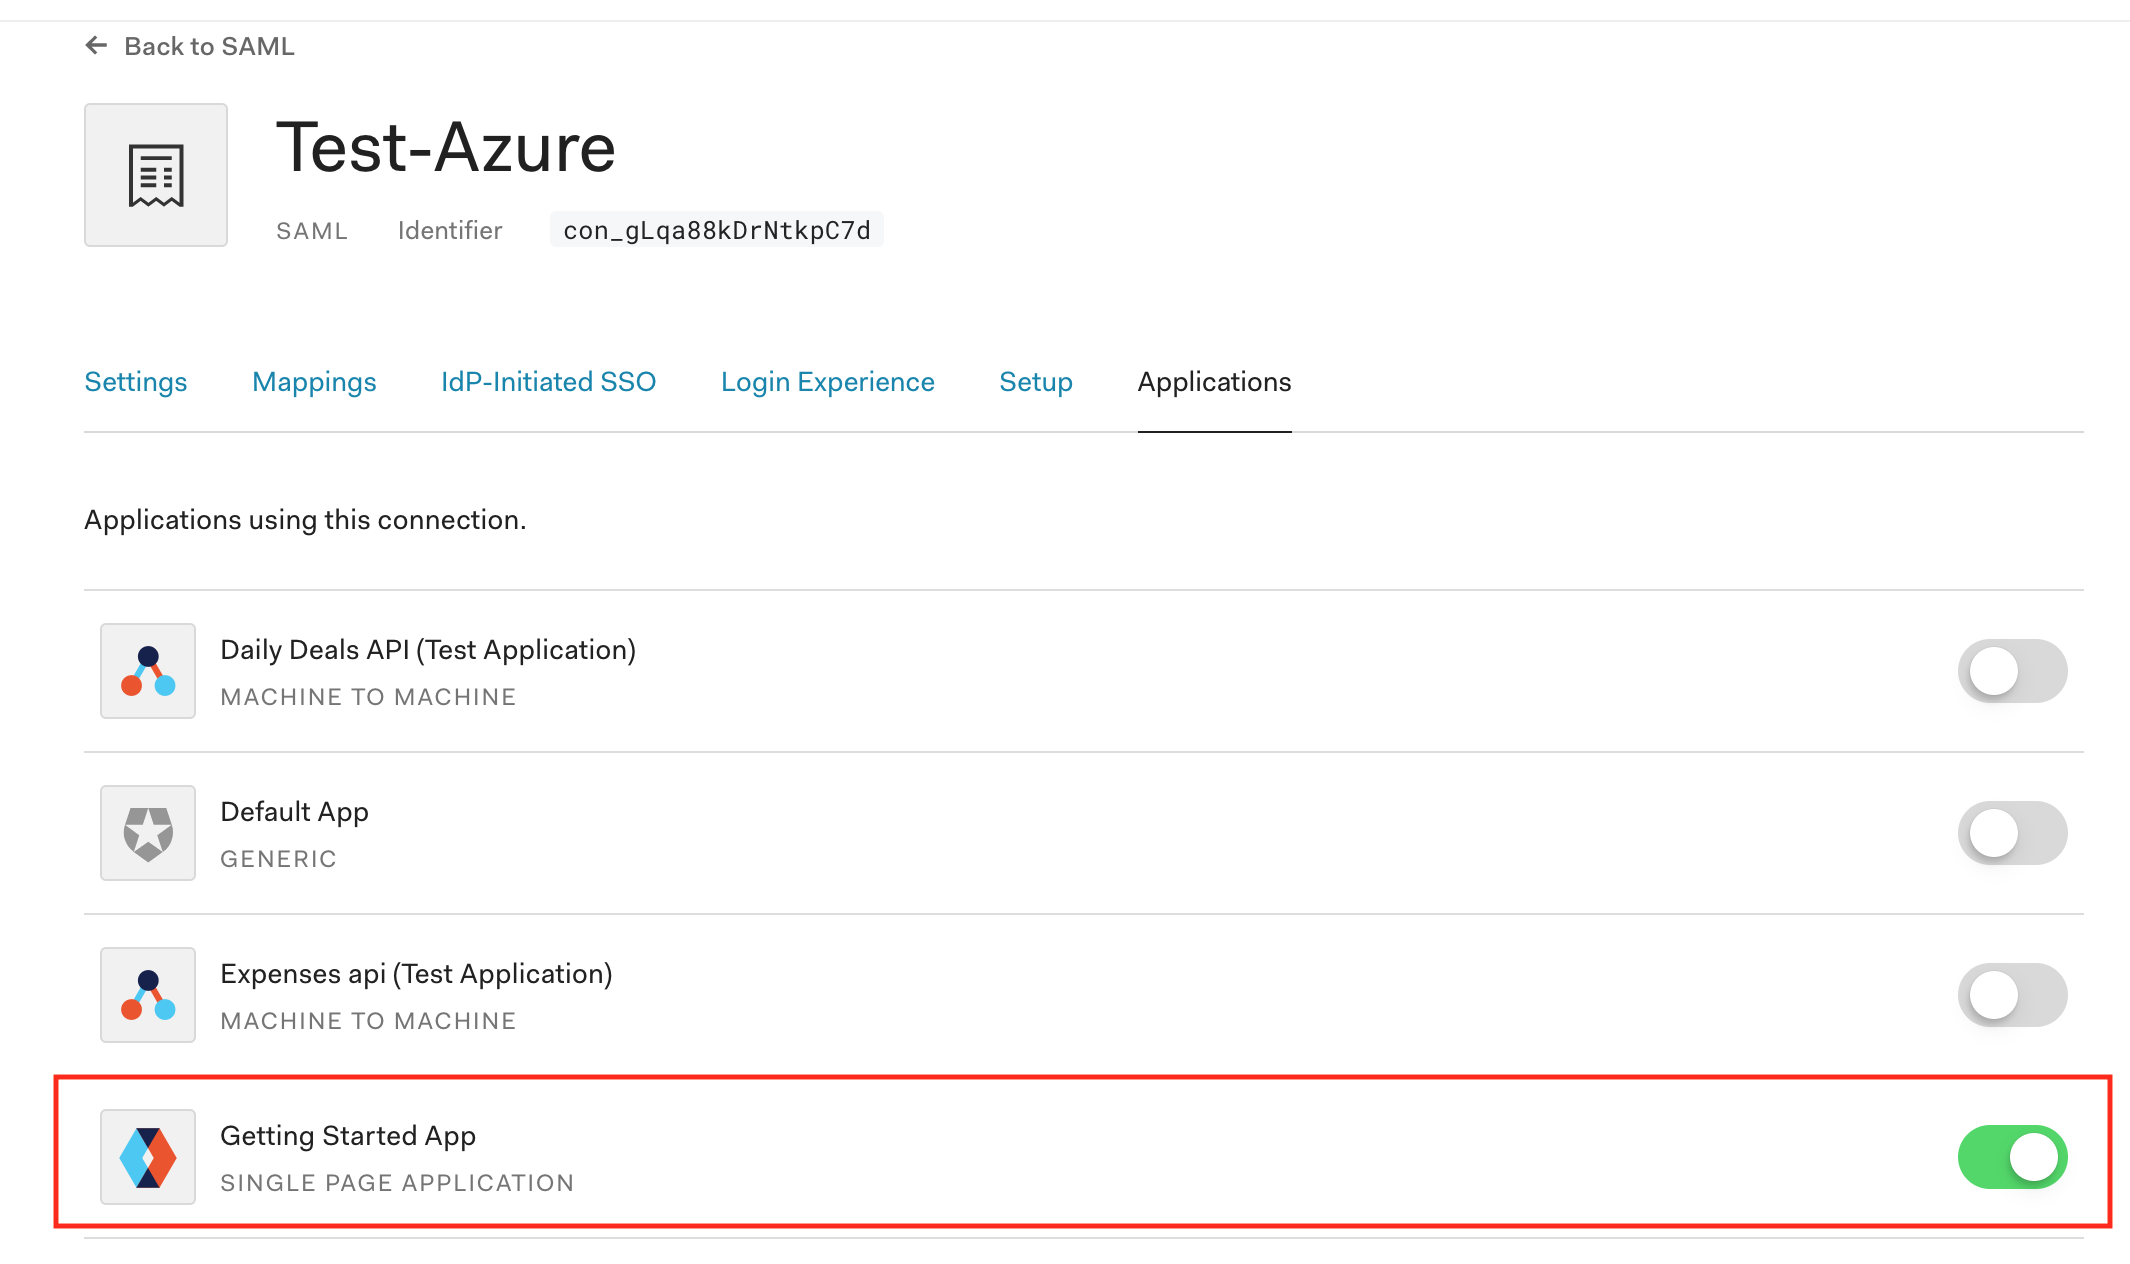
Select the Applications tab
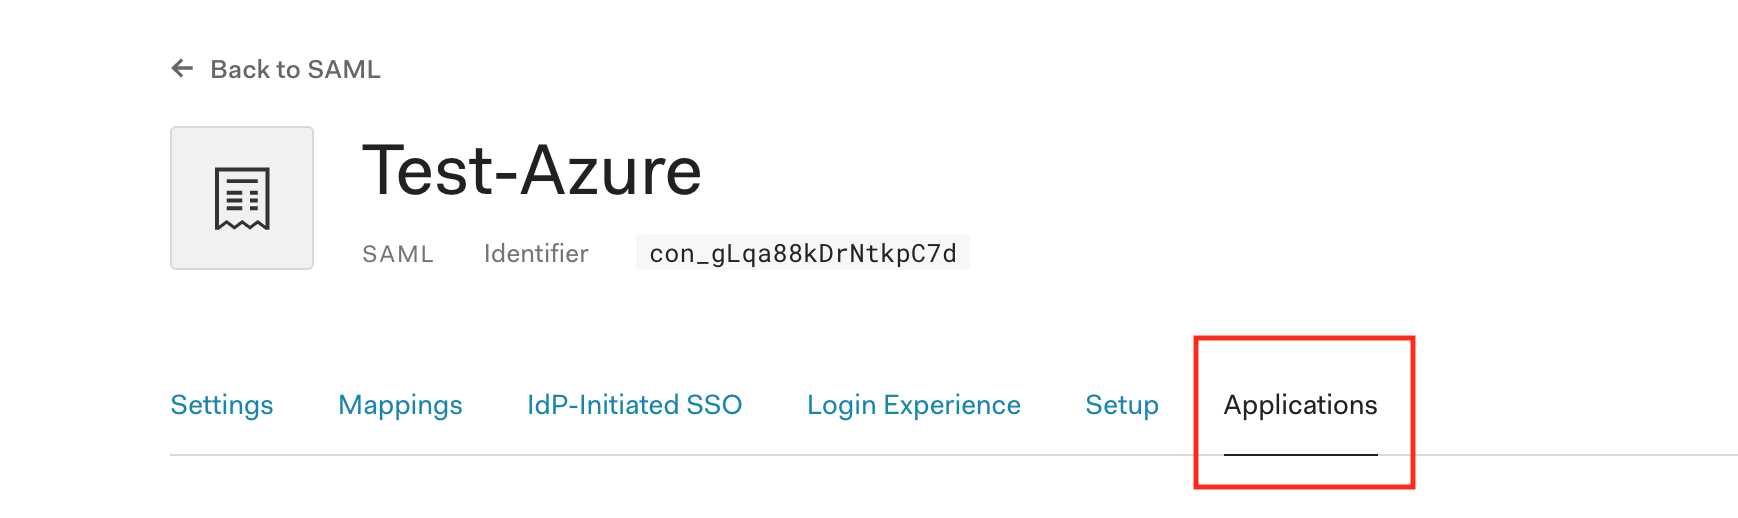
Enable all applications which will be given access from this connection.
This completes our setup on the Auth0 side, now to complete the configuration we now need to go back over to Azure AD to complete our setup.
Updating Azure AD
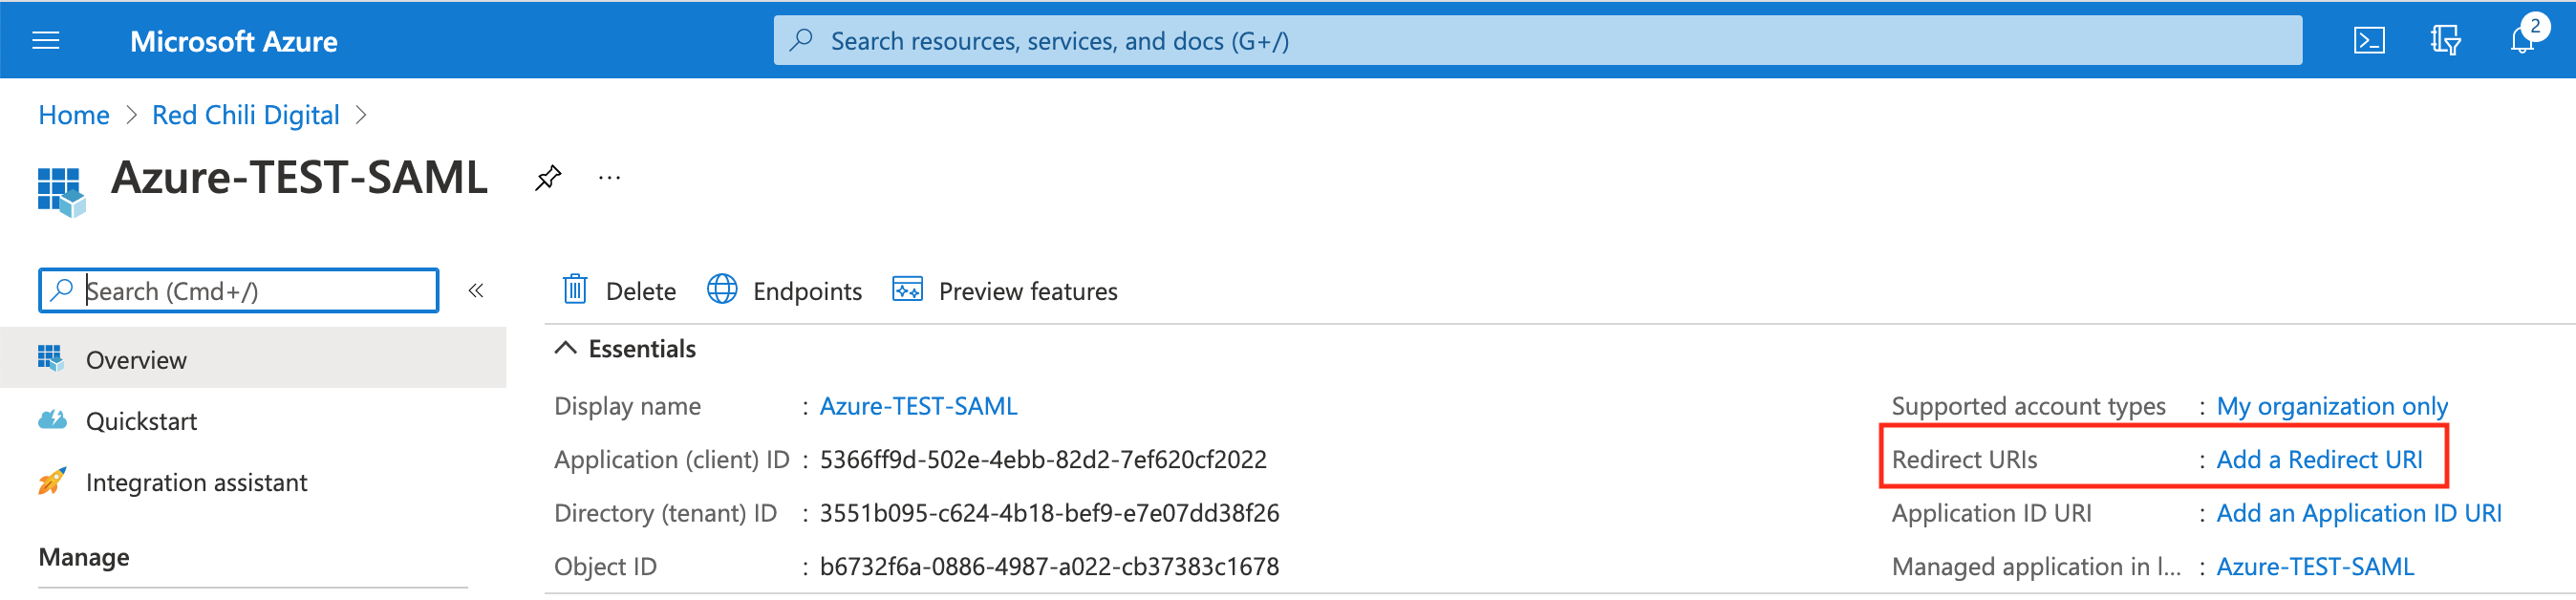
In the Azure AD console, in our new Azure AD application select the Add a Redirect URI link.
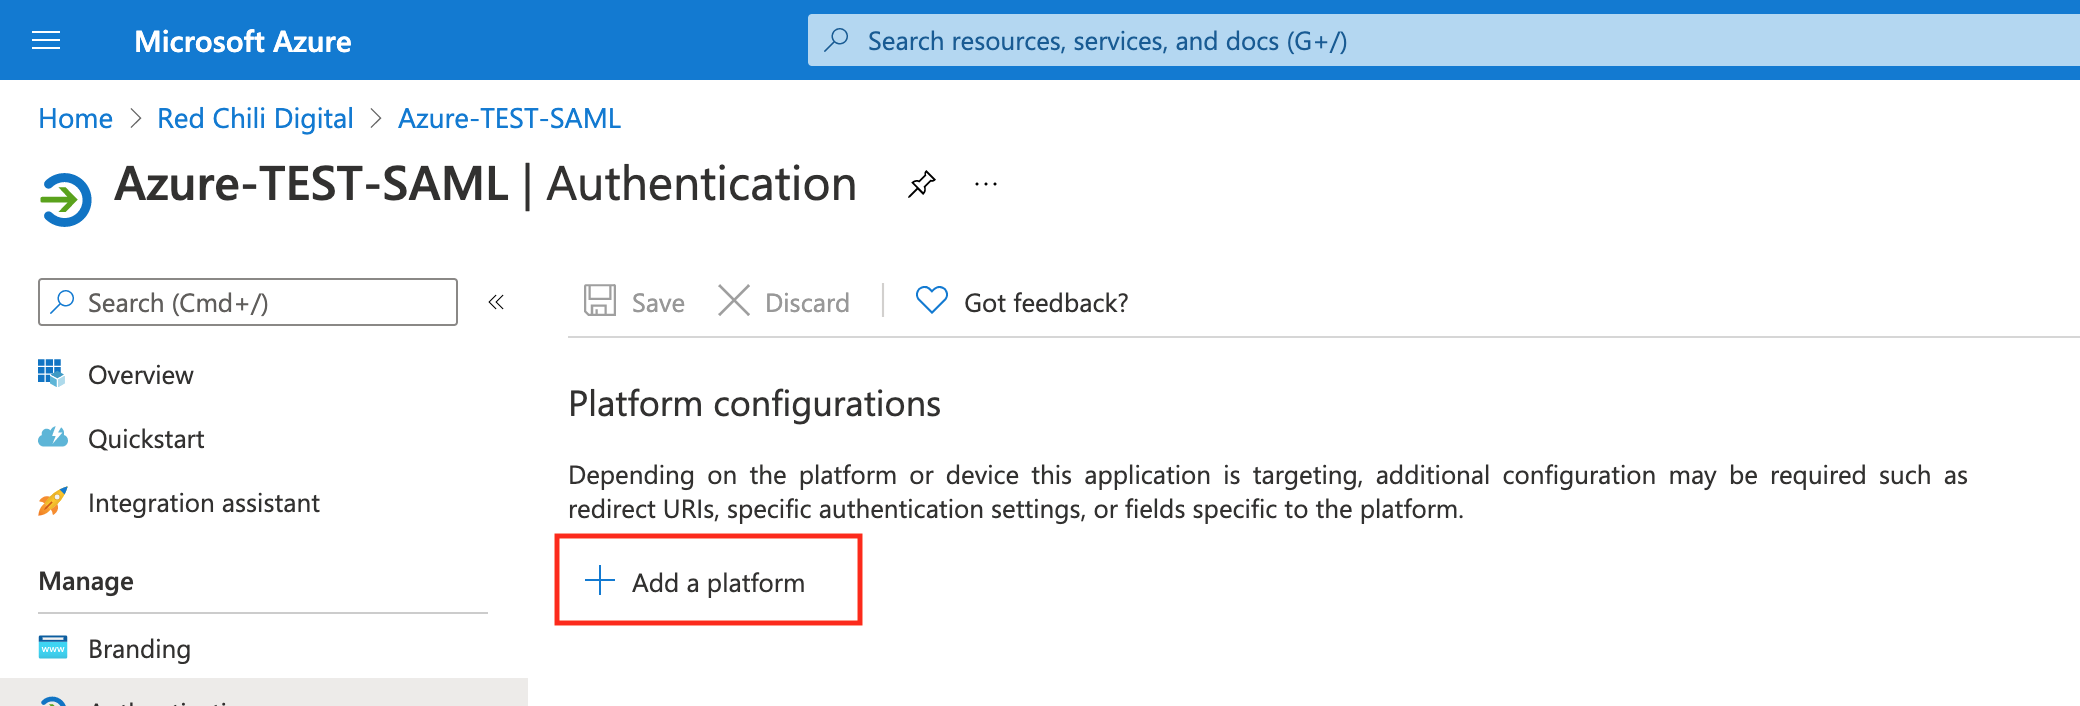
Select the Add a platform button
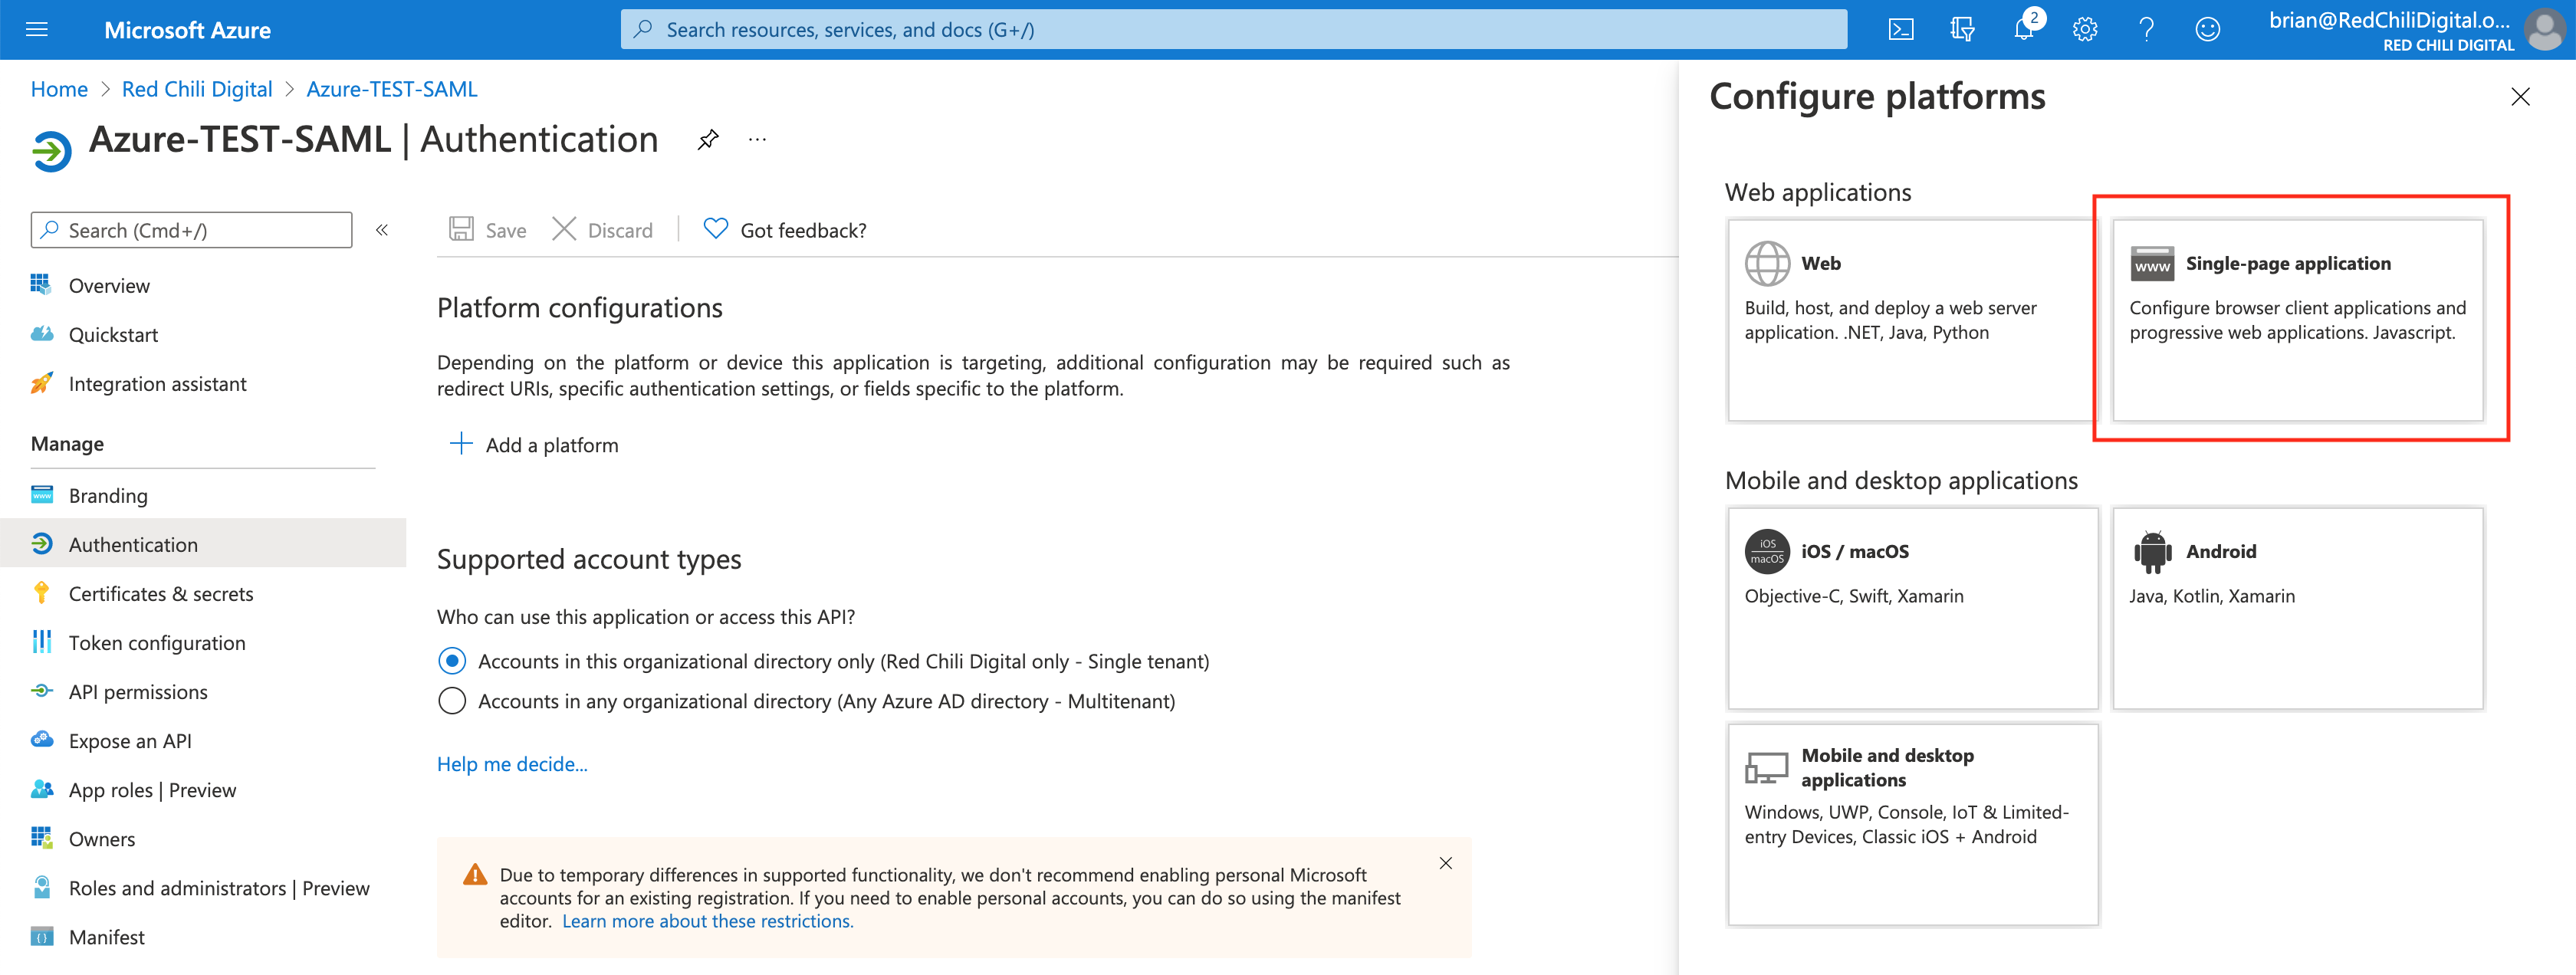
Choose the correct platform for your application, I’ll select Single-page application for my use case.
Complete the platform form for your application. Note: this form may vary based on the platform type you selected.
- Redirect URI: This is a URI provided by Auth0, we’re using the _post-back URL, that can be found here: SAML Identity Provider Configuration Settings
- Front-channel logout URL: Also available in the configuration documentation
- Tokens: I have selected ID tokens for our use case
Select configure
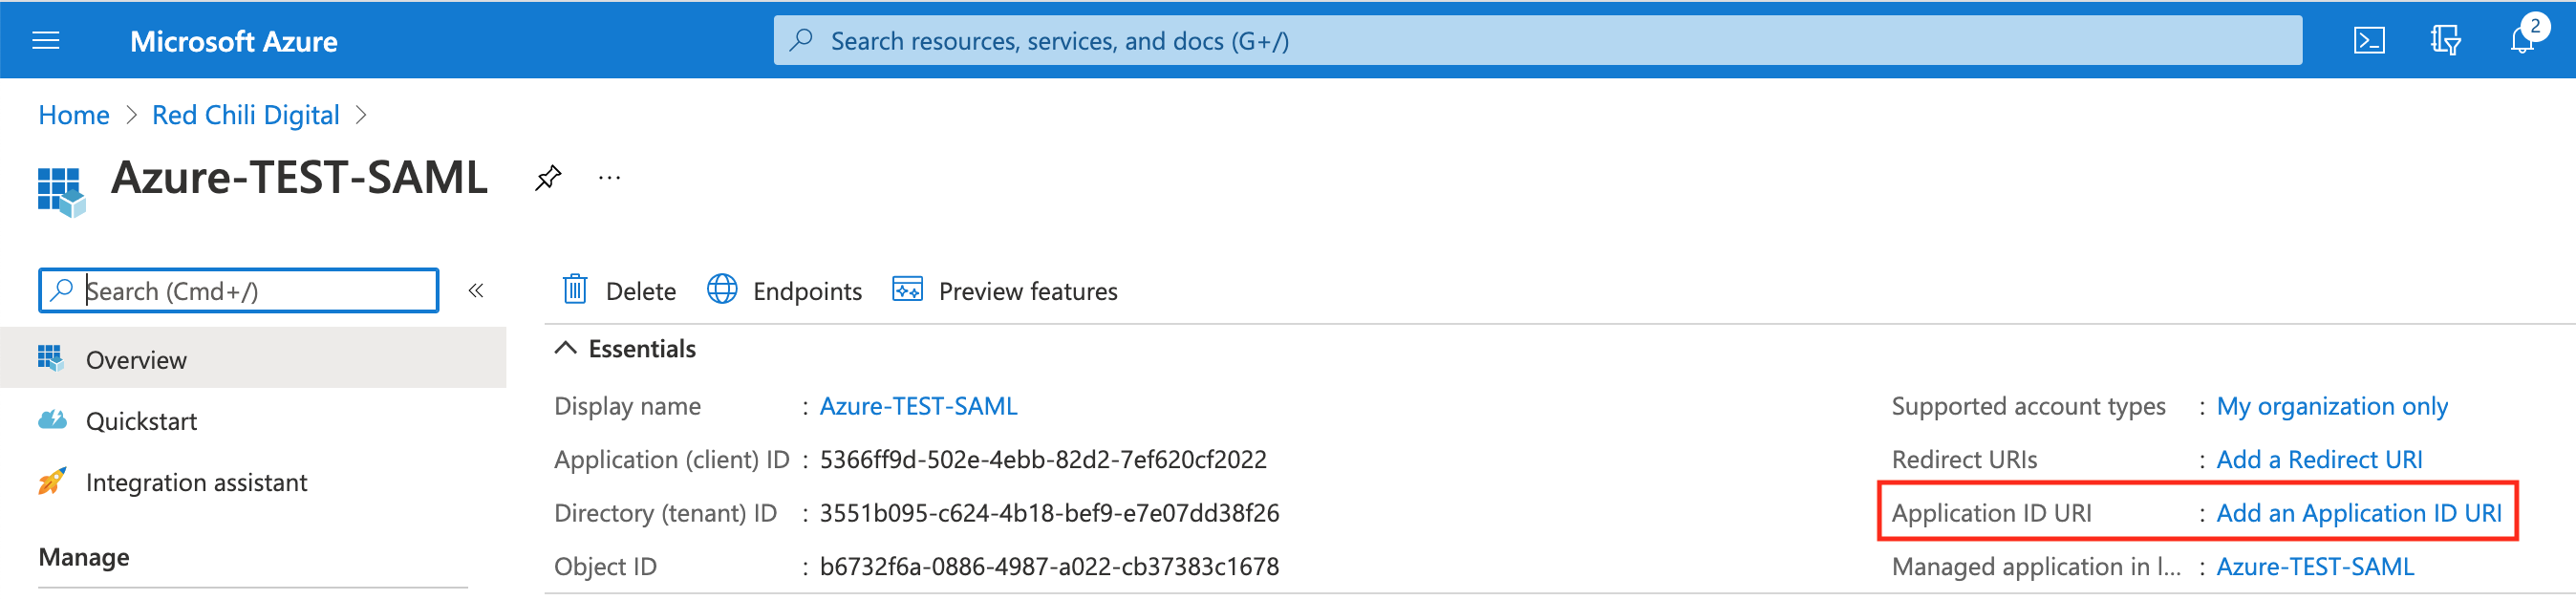
In the Azure AD console, in our new Azure AD application select the Add an Application ID URI link.
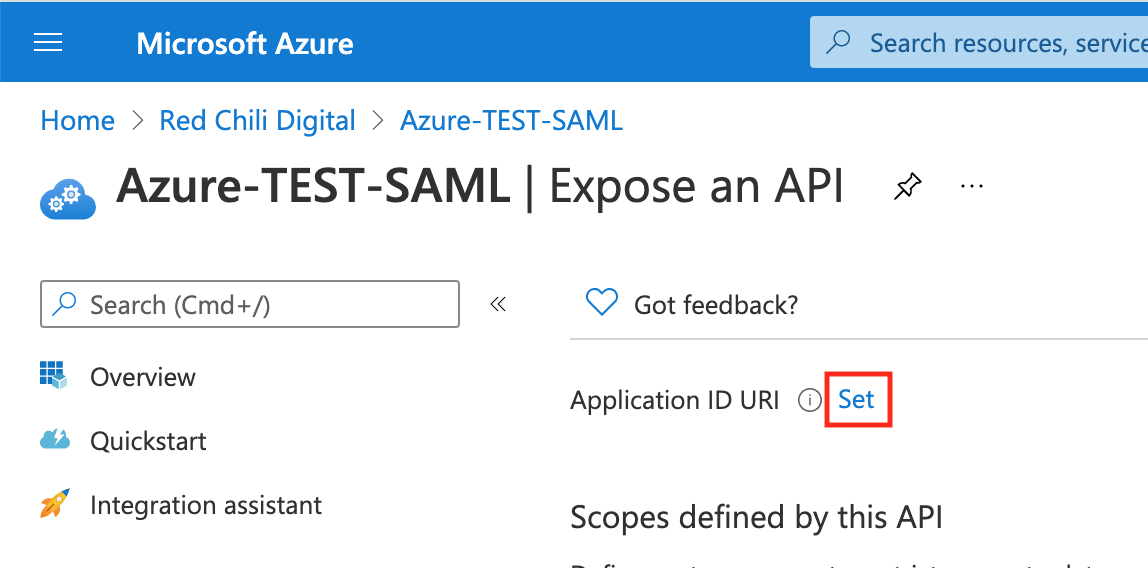
Select the Set link
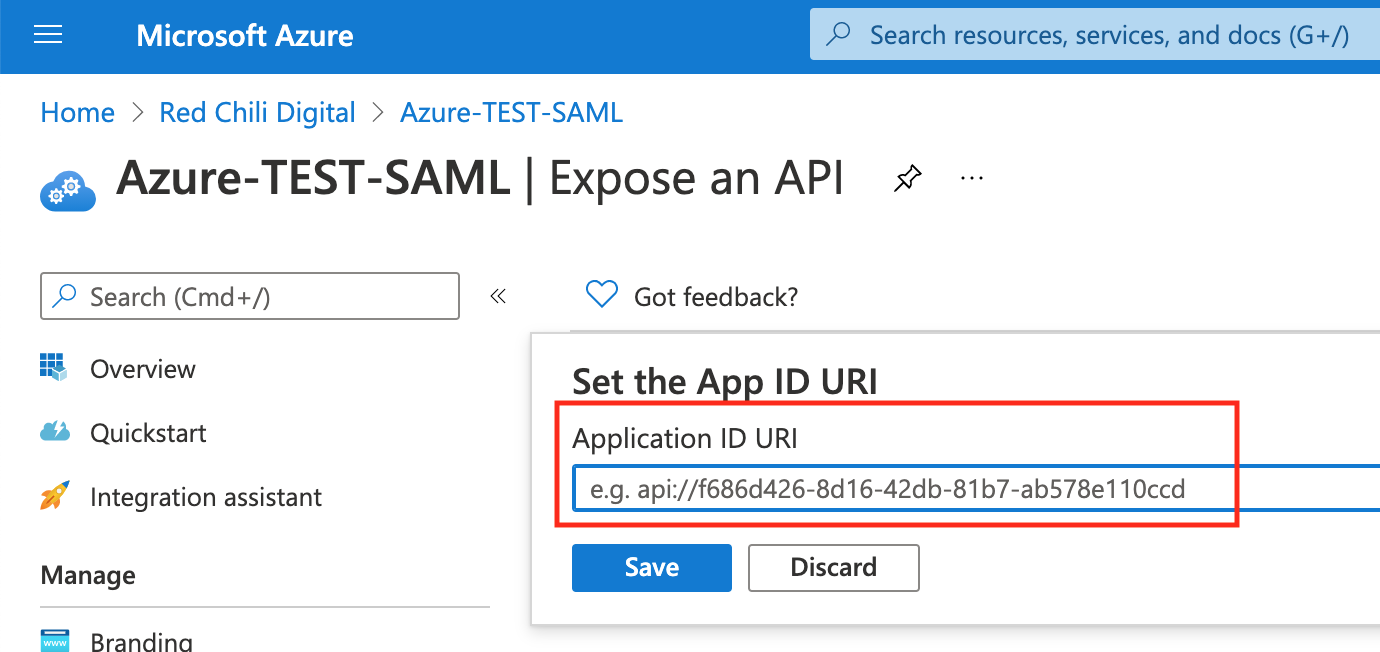
Paste in the URN (Uniform Resource Name)https://en.wikipedia.org/wiki/Uniform_Resource_Name of your application. This value is assigned by Auth0 and is available in SAML Identity Provider Configuration Settings as an Entity ID.
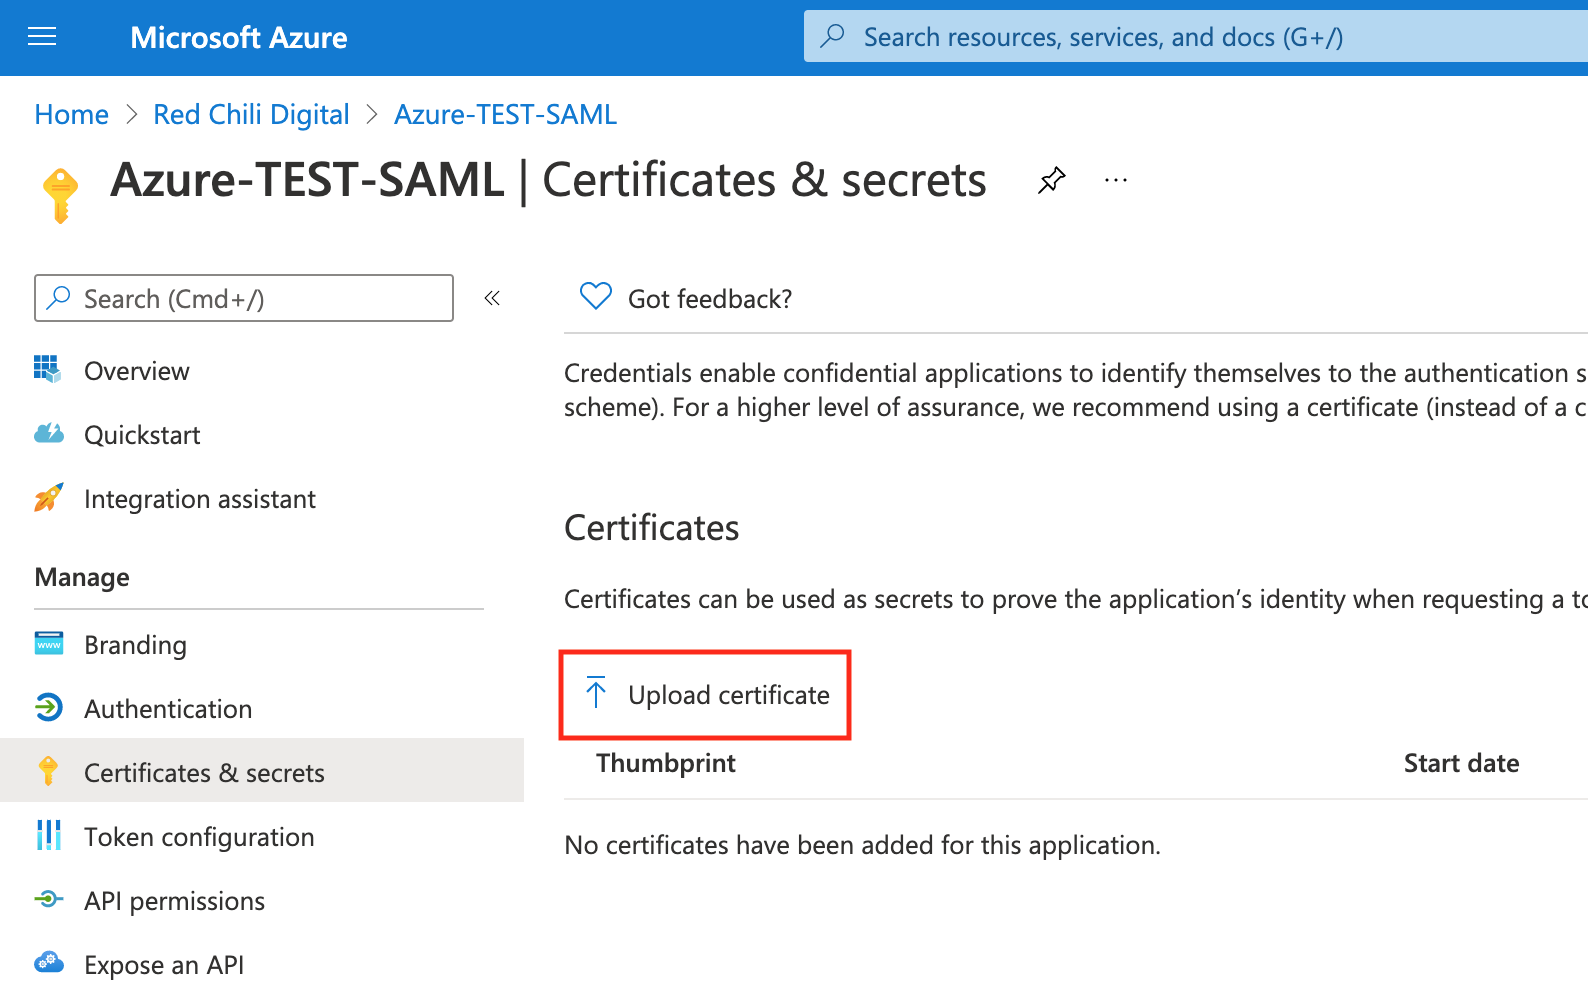
We now need to upload the .pem certifate that we downloaded from Auth0 and upload it to Azure AD.
From our Azure AD application overview page, select Certificates & secrets from the navigation bar.

In the Certificates & secrets page, select Upload certificate, upload the certificate from Auth0 and select save.
Testing the Connection
If we’ve done everything correctly, 🤞, we can test our SAML connection between Azure AD and Auth0. Auth0 has a handy tool in the console that allows us to test the connection directly.
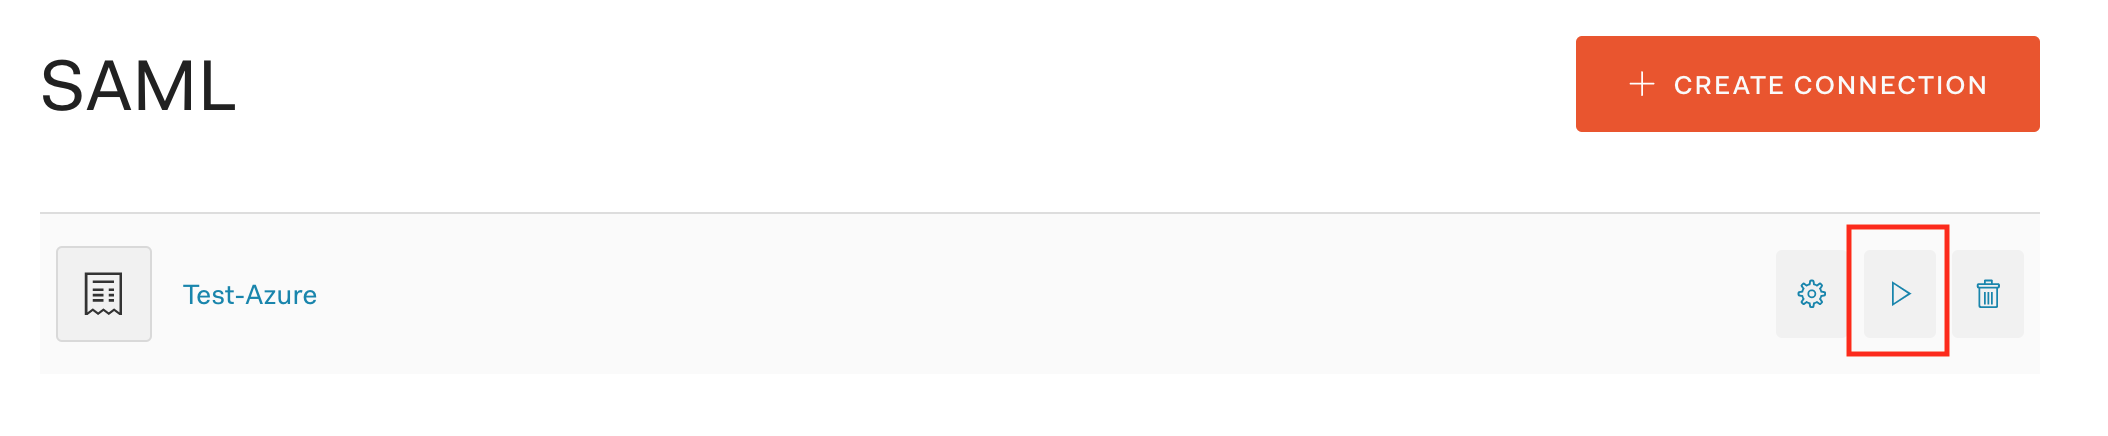
From the Auth0 Console > Connections > Enterprise > SAML, select the test button next to our new SAML connection. This will trigger the SAML authentication flow to begin.
We should be redirected to our Azure tenant and be presented with a consent form. Review the information being requested, etc. and if acceptable select Accept.

If our connection was configured correctly, we should be redirected back to Auth0 where we’re presented with a page that says “It Works!”
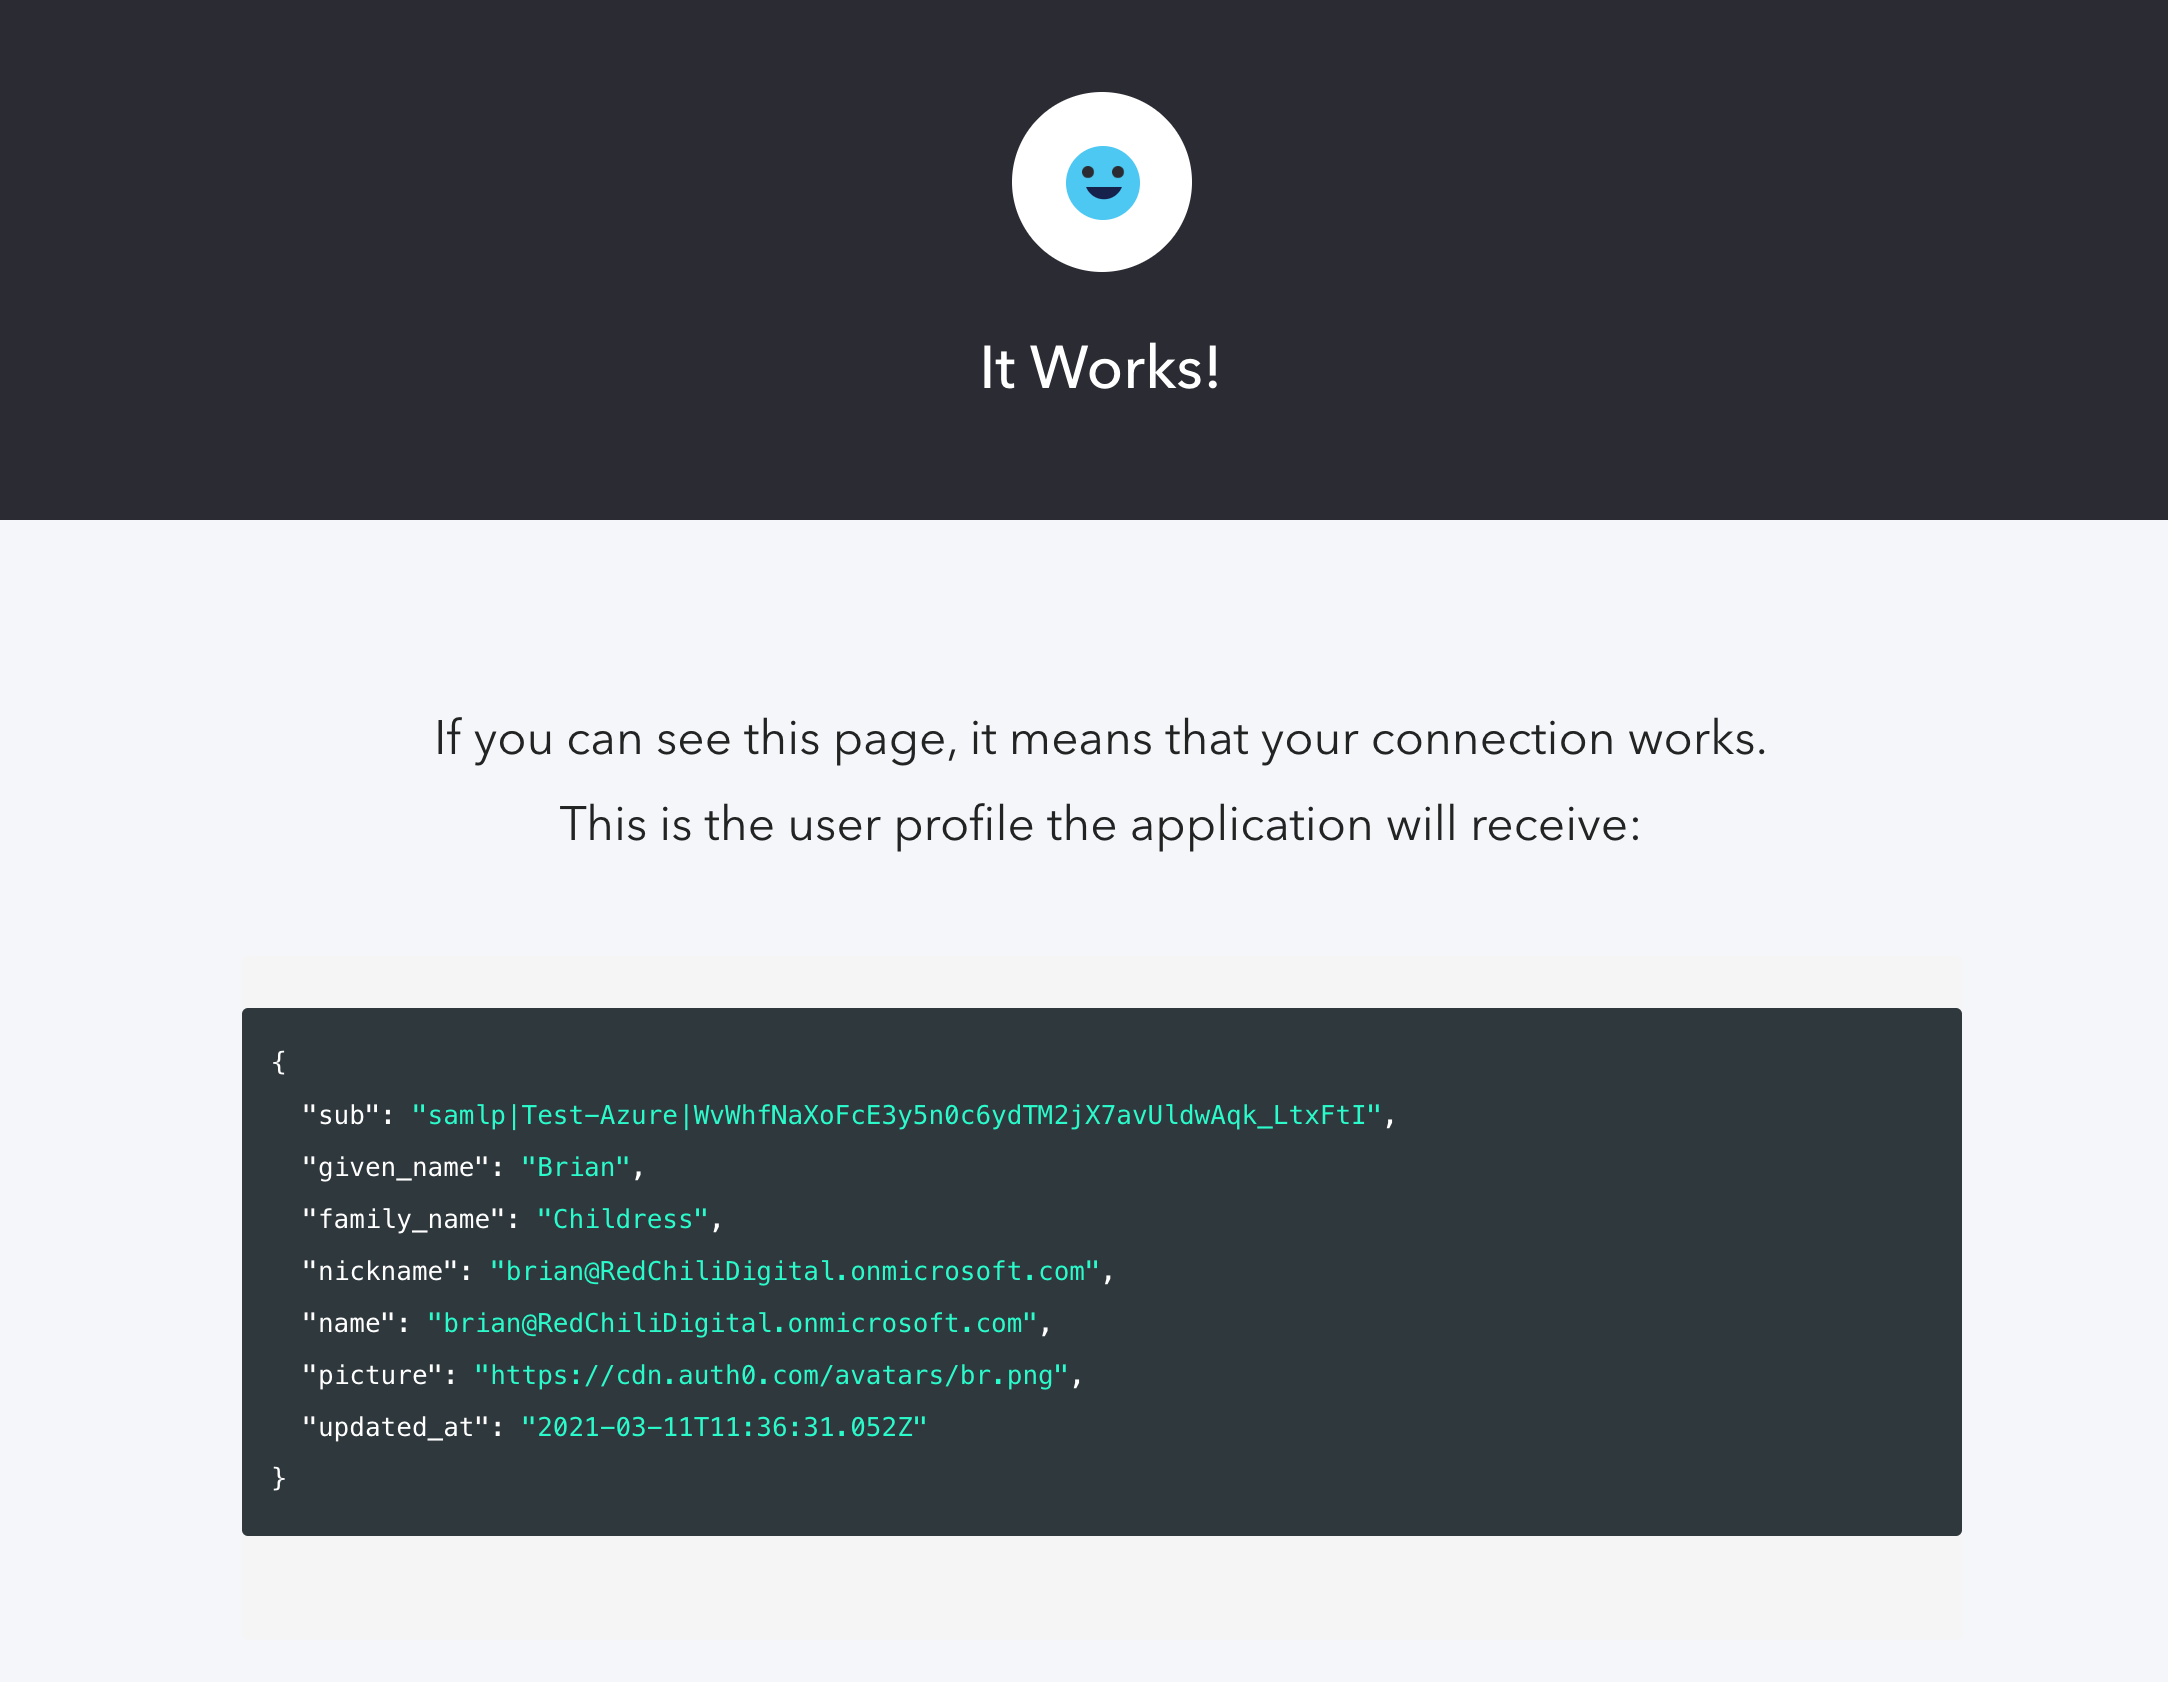
We now have a working SAML connection between Azure AD (Identity Provider) and Auth0 (Service Provider). The information we shared between the two systems is publicly available and safe to share.